Wednesday, August 17, 2011

We had an eco-friendly wedding because it was cheaper

We had an eco-friendly wedding because it was cheaper

I have google searches set up to look for key words. The Wedding Industrial Complex is setting up the eco-friendly wedding movement to be more expensive, but it doesn't have to be, and it shouldn't be.

http://www.oakmonster.com/2009/07/11/what-the-fad/
--------------------------
“My friend is having a green wedding,” an acquaintance said.

Everyone present chimed in. How cool! How exciting!

Of course, being me, I piped, “Ah! Green wedding. Also known as just another wedding that cost twice as much.”

“Well, they’re using all these recycled materials and stuff. You know, being really green about the whole process.”

I chuckled.

The acquaintance, at this point, was getting annoyed with me. “Well, she’s a very environmentally conscious person. They want their wedding to be good for the environment.”

Having a “green” wedding because it’s trendy and then you go right back to live your normal, not-so-green life? What’s the point? Well, I guess with a “green” wedding, you can now show everyone just how socially responsible you are.

------------------------
Part of what made our wedding so wonderful was how sustainable it was, but it took research, time and commitment,and we had a green wedding and put up our entire family for a very reasonable amount.

I didn't understand the value of a "wedding" until I had one. I wanted to elope, but after having a weekend long, community building, love surrounding event - I'd do it again in a heart beat.

I made a joke at a toast at the wedding- but it was true:

Part of why our wedding was green was because we cared, but it was mostly because we were cheap.

Homegrown Paso Robles Vacation

Homegrown Vacation

I know I promised to post the playlist on Thursday, but we decided to go on a little vacation - I'll get on it tomorrow :)

Of course I had tons of homegrown wedding ideas in Paso Robles - but also faced a little reality.

Homegrown, sustainable, and inexpensive take a lot of creativity - especially where eco-friendly isn't cool.

Creating an ipod wedding playlist

Making our iPod Playlist


I always thought that I would have a live band at my wedding. I've never been to a wedding with a real band, but who doesn't love a great cover band. The more I got to thinking about it, I didn't want people focusing on the band, I wanted them enjoying each other's company.

This is where the wedding mix research began.

We invited all of our friends and cousins over with their CD's so we could burn them. Great way to get to spend time with family and friends and get cheap music. We ended up with 16 hours of music.

I looked all over the web for a "formula". I found other people's playlists, but no formula for slow to fast.

I ended up doing a ton of research and found the most help on some DJ networking sites:

http://www.ourdjtalk.com/

http://www.djforums.com/forums/forumdisplay.php?s=366a3ace04958372095994...

You can do a lot of reading there, or you can trust me.

Here's the formula:

Start with older songs that old people will want to dance to and get to the more popular current music later.

1 slow song, 3 or 4 fast songs, 2 slow songs (repeat a couple times)

As the night goes on, the slow songs get fewer and fewer (most of the night should be 6-8 fast songs to 1 slow song).

Keep genre's of music together (disco around the same time of night, country, hip hop and pop music toward the evening).

We ended up fast fowarding through some of the slow songs later into the night.

---

Our site had a mixing board and speakers so all we had to do was bring the ipod and put someone in charge of it.

My brother started the cocktail mix too early and started the dancing mix during cocktail hour, but it was easy enough to give him a signal to have him change it back.

Greatest dance party ever.

Surprising hits:

The Grease MegaMix
No Scrubs
Michael Jackson (though it wasn't a surprise, it was a huge hit)

We didn't plan a first dance or father daughter dance, but they happened organically early on in the night just because we wanted to dance with each other. It was pretty perfect.

I'll post the actual playlist tomorrow.

Packing, Planning, Organizing, and Finally Getting Up to the Lake

Getting Up to the Lake

When we started talking about getting married, my immediate reaction was to elope. I didn’t think that we could have the kind of wedding I wanted on our tiny budget with my insanely large family – so I figured we should just forget about it. Our families ended up contributing about 1/4 of the budget which helped us tremendously, and my fabulous husband had some money tucked away that made it possible for our dream wedding to happen.

Despite all the do it yourself, garage sale-ing, thrift store, craigslist, small town goodness, I think our total budget came in under $15,000 (this includes housing for 45 guests in houses and another 20 or so camping or in loft space, rings, clothes, van rental, flowers, day of coordinator, invitation paper, the whole shebang).

Even up to moments before we left for the wedding, I thought I would regret having spent that money. Now, I would never give up the experiences, the laughter, the togetherness, and the love for all the money in the world. It was totally worth it.

Mishaps along the way:

We rented a pick-up truck to deliver the garage full of vases, wine glasses, cases of wine, 15 8’ tall branches, etc. When we arrived at the enterprise location (about 30 minutes away to save $200), the truck was way too small. Lucky fix: they gave us a more expensive cargo van for the same price!

After my original flower order was canceled by organicbouquets.com about three weeks before the wedding, I ordered flowers from Sequoia Flower Mart in Santa Rosa (about half way between our house and the wedding location). I was specific in my order (25 bunches of white ranunculas and 10 bunches of babies breath). I had done all of my planning around white ranunculas and babies breath.

I talked to them a few days before pick up, gave them a deposit, and we were good to go. After Bubbs and I packed up the van and drove away (at 8am), I headed straight there to pick up the flowers (we brought two large plastic bins to put them in). When I arrived (with my future step-mother in law in tow) they showed me 7 bunches of PINK half dying ranunculas and 13 bunches of freesia. I calmly explained that my wedding didn’t have color in it at all (and if it did, it sure wouldn’t be pink), and that it just wouldn’t do.

Thank goodness for my days of relaxing and my motto for the weekend "at this point, you can't do anything about any problems - go with the flow." I repeated that motto to myself over and over again as the days went by. AND it worked.

Lucky fix: they gave us beautiful lisianthus and freesia, and about 100 extra stems for the same price as the ranunculas – had we ordered the lisianthus to begin with our cost would have been double!

We ordered our beer in kegs from the local organic brewer. It was a little confusing making the order and we had difficulty getting a hold of the right person (which was a lot of our experience in this sleepy Mendocino town). Hardly anyone works on email which is my preferred method of communication.

When Tim arrived to pick it up they didn’t have the correct order ready and he had to wait about an hour (after a two hour drive with another hour to go) to get the kegs. When he arrived at the Lake, I realized that they had given us the wrong size and amount of kegs and charged us too much. We called and they came out to fix everything. Lucky Fix: to make up for their mistake, they substituted the regular stout we ordered with an amazing special brew aged stout that blew people’s minds.

Stealing for our Ceremony - Building a Chuppah

Stealing for our Ceremony - The Chuppah / Canopy


One of the most beautiful elements of our friend's wedding was the chuppah. We decided we had to have one, but we decided that Bubbs would make it.

This was also the one and only thing about the wedding that stressed me out.

I had a vision in my head of a rustic structure with flowing fabric blowing in the wind. Since I'm not an artistic person it was really difficult to convey this image to my fiance.

We set out to the San Francisco Flower mart to find some (in order of preference)
1) birch branches
2) bamboo branches
3) anything that would work

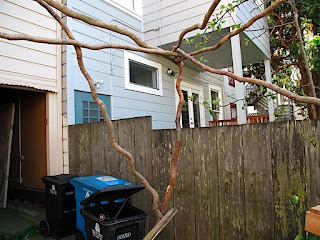
We came across the "stick" guy who had beautiful curly willow branches for sale. 5 branches for $15 dollars (the birch were about $75 each and bamboo was about $50 each). Bubbs decided that we needed 15 branches to do the job which is where my first concern started to bubble over. I let him guy them and we strapped them into my teeny car and brought them home.

Some of the first attempts really stressed me out. Bubbs just wasn't getting my vision, but he really wanted this to be HIS project.

Most of his "creations" were just too bulky, function over form, and really not steady enough for me to feel safe standing under during my wedding.

A lot of people build their Chuppah or canopy using cement to anchor the sticks, but I didn't like the aesthetic of that, nor did I want to have to carry heavy buckets filled with cement up to the wedding.

I suggested using Christmas tree stands on 4 of the branches and draping the fabric to the top. It would be easy, light, and look like what I wanted (see example below), but he wanted to use power tools :)

Eventually, many designs later, we came to one that would work for me. It used all 15 sticks, was big enough for us to stand over, and stood free form in the backyard for several days.

When Bubbs and the "men" at the wedding recreated the Chuppah, it didn't come out exactly as we had planned, but once we arrived at the wedding, I put on my "I've done my planning and I will refrain from micromanaging the process" attitude, and let it be.

Lesson's learned:

· Simple structure is better

· Take pictures and give them to the people who are setting up for you

· Write down the details they might not know are important to you

· Secure the fabric to the top of the chuppah so it doesn't blow away or move around during the ceremony

· Set up the day before so you can tweak anything that doesn't work for you

Stealing for our Ceremony - A DIY Seven Blessings

Stealing for our Ceremony - The Seven Blessings

Right when Bubbs and I decided to get married, we attended the wedding of some friends of ours.

This is a post from our personal wedding blog:

Sunday night Tim and I attended the wedding of our friends. We didn't really know anyone but the bride and groom, but met great folks there and got some good ideas. I've never been to a Jewish wedding before, but I think this one was adapted from a traditional ceremony only using the couple's favorite parts. A couple times during the ceremony, Tim and I looked at each other with knowing eyes that said "we're totally stealing that". These things were: The huppah, the seven blessings, and the ketubah. I think Tim likes the fact that we'll be signing a contract, but the wording on our friend's ketubah was amazing. We're stealing it. One of the best parts of the night were the speeches given by their wedding party - they were all beautiful, funny, sincere and interesting.

Stealing those components were key. Several months later people still talk to us about the blessings our families gave.

We talked with our family (luckily, we had exactly seven family members) to explain what we wanted. They could read a poem, and except from a book, they could write something, we just wanted their "blessing" on the day and on our love. We had to re-explain several times (a challenge of a home-grown non-traditional concept). But they ended up perfect. What was really special was different blessings resonated with each of our guests.

My mom wrote something that people still talk about. Explaining our love from her point of view.

Bubb's mom chose a traditional Jewish Blessing.

His brother and sister in law read a Neruda poem

My brother wrote something, as did bubb's dad.

My sister brought her whole family up (my niece the flower girl sleeping in her arms) and played on her ipod dock, "let's stay together" by al green. The song went on just a little too long, but people were singing along, it even brought one of our friends to tears.

My dad and his wife read the Optimist's Creed (and changed it up a little to make it fit the task)

Some people cried when they read their reading, some made us cry, and even though it might have looked hectic up there, we got up from our little bench after each reading to hug the reader. This was by far my favorite component of the ceremony.

Invitation Inserts - RSVP Two Ways

Invitation Inserts - RSVP


Our RSVP cards were postcards. It saved us money on stamps for them as well as on the weight of the actual invitations. Two got lost in the mail, but the rest arrived no problem.

One of the coolest things we did was create an online RSVP. I searched and searched for a "widget" or "doodle" or whatever the things are called you can insert into blogs, but couldn't find one that would create a form to collect information.

We used surveymonkey.com to create a free survey and on our blog we linked to it. The data that was entered by our guests was then accessible in a spreadsheet for us to sort and look at. The majority of people used our surveymonkey survey and it was a great way to collect email addresses, song requests (which were a HIT on the dance floor), and to make sure we were spelling names correctly. The only bummer with survey monkey was that they don't email you when new people have responded to your survey, so we had to keep checking back.

Invitation Inserts - Accomodations

Invitation Inserts - Accommodations


Since each invitation had a different accommodation listed, I used the old fashioned 'fill in the blank' method. I wish I had taken the time to print each one individually or used a mail merge. The reverse side of the invitations had the names of the people they would be sharing a house with and their contact information so they could plan on food sharing.

Invitation Inserts - What to Bring

Invitation Inserts - What to Bring


This was a very important insert. Since the houses were equipt with full kitchen and bathrooms, I wanted everyone to know they needed to bring food, but not much else. We still ended up needing to tell people in person, through a mass email, and still through word of mouth, but this was the beginning of their understanding of what a homegrown wedding weekend would look like. We had three different inserts for "what to bring." One for campers, one for people who were staying in a house, but didn't have a room, and one for people in the houses that had a room.

Invitation Inserts - Map & Directions

Invitation Inserts - Map & Directions

I made this map using the DIY instructions here:
http://www.weddingbee.com/2007/05/04/diy-invitation-map/

It was a challenge, but I am very happy with the way they turned out. Our location is in a very remote location with no signs - so the map and detailed directions were KEY.

Invitation Wording - What it actually SAID

Invitation Content - The Invitation Itself

One of the things I struggled with on our weekend long wedding was how to convey the ideas and the flow of the weekend to people. We had a lot of room in the invitations to try, so I thought I'd post the components in case you want to borrow.

I used Microsoft word for all of my invitations. Should I have used Publisher, illustrator, or some other programs actually MADE for graphic stuff? Probably. Would have have saved me TONS of time? Probably. Was it in our budget? Nope!

Invitation wording:

Together with our parents Bubbs McDude & Gigi Geegerson

invite you to

join us for a weekend

among the redwoods

as we celebrate

our love &

join our lives
together

Magical Place
Redwood Valley, CA

May 29-31, 2009

Ceremony at dusk
May 30, 2009

Reception immediately following

Homemade Pocket Invites

I made my invitations, from scratch (except the pocketfolders which I bought).

Materials:

· Home color printer>

· Wausau Stardust Premium Cardstock, Ivory ($11.00 for 100 sheets - office supply store)

· Pocket folders, vertigo style, mocha - .85 each on clearance at http://cardsandpockets.com

· Double sided tape

· Corner rounder

$4.00 at Michael's Crafts

Lessons learned:

1) Search the internets, magazines, stationary stores, and blogs for invitation inspiration. I got started on the invitations early because we didn't have a budget to have them made, and I knew I would have fun working on them.

2) Start early. Play with them while you watch TV, in between turns on scrabble, and during your breaks at work (if you really want to bring your wedding planning to work :). When I would work on them and be able to put them away for awhile, I would figure out the problems I was having and come back refreshed and ready to work again.

3) Don't use black ink for cutting lines if you are printing more than one "insert" or item per page. Use the lightest grey possible. This was a VERY painful lesson to learn. I spent a lot of time re-cutting the lines to get rid of the black thin line along the edge.

4) Sometimes its worth it to just buy something pre-made. I knew I wanted to make the invitations myself (The wedding just wouldn't seem like our wedding if someone else made everything), but after over $20 worth of supplies and many frustrating attempts to make the pocket folders, I found them on sale for about $20 total. Buying them was well worth it.

5) USE ETSY! The tree graphic we had was "borrowed" from a painting we found online. After many failed attempts to make the tree brown (and we're talking over 5 hours of work) and also white (you'll see another earlier version of the invite later), I put an alchemy request on etsy to have someone turn the painting graphic into a high resolution image. 15 minutes later and $10 out of my paypal account, I had two graphics that were PERFECT.

6) The $4 corner rounder is well worth the effect. My poor husband gave his thumbs to me over many evenings and rounded the corners on all 6 inserts of our invitations and they were SO worth it. When people found out we made the invitations they all wondered how we got the corners round.

7) Making a pretty map is easy - and fun. I used these DIY instructions and got a lot of great comments on our map: http://www.weddingbee.com/2007/05/04/diy-invitation-map/

8) We used this motto again and again in our wedding planning, and it really helped with the invitations: If someone is going to be offended by us __________, do we really want them there? In the case of the invitations, the "blank" was that we typed the names and addresses on the front of the envelope. We went down the list of guests and decided that not one person would object - or at least say anything. Our wedding was going to be different from any they had ever attended - and this was the perfect way to introduce them to that.

9) Send yourself a sample in the mail and also to someone who hasn't seen it yet for a fresh set of editing eyes.

Earth Friendly Engagement Ring

When Bubbs and I first started talking about getting married we discussed what kind of engagement ring I wanted.

I had always loved my aunt's ring and told him what I wanted based on that.

One afternoon, we were having lunch with my aunt, who is also a jeweler and Bubbs asked her about eco-friendly jewlers - long story short, she gave him the ring.

THE ring that I've always loved. She offered it to him so he could use the metal to create a new ring, but once I saw it, there was no way I would let him do that. He decided to change out the stones it came with and re-do a little detail work on it before he would "officially propose."

From Bubbs:

So, here's a little dish about the engagement ring. It is an amazing 1920's platinum setting from a family member. I chose a dark sapphire (but with a lot of fire) as the center stone and Moissanite (clear and almost as hard as diamonds but with more reflectivity) as side stones. After much research into the environmental and social damage caused by mined stones, I decided to use lab created stones from Chatham Labs here in San Francisco.

Though this is a hot new trend among us tree huggers in SF, it has been a challenge to find a good goldsmith willing to do the work. The etching and shape of the setting is quite a work of art--platinum in the 20's was a new harder precious metal that required extra skill to etch--and so I wanted someone who could restore the setting. There is a small diamond chip that needs replacing and some previous repair work was done in white gold and should be removed and replaced with platinum. Also, the palm side of the band has been worn thin from years of use (a good omen as far as I'm concerned) so had it shored up for another 70+ years.

Components of a Community Based Wedding

In no way am I saying that our wedding will work for everyone. But it was perfect for us. We want to share what we hope becomes a new tradition in weddings.

We live in an expensive city (San Francisco), and a lot of what made this wedding possible, was traveling three hours outside the city. Prices immediately dropped (for everything but rentals) when we got outside the traditional wedding areas.

I'll list our components here and go into more details in a future post.

Community

· Our entire guest list (except one pregnant couple) stayed with us on the site.

· While not everyone can do this, we wanted to find a place where we could host our family's accommodations. The economy has hit our family hard and wanted everyone to come celebrate for all three days. It was completely worth it, and everyone appreciated it.

· We grouped people together and asked them to plan their meals before the wedding which spurred amazing groupings, beautiful moments, and great food!

· Despite our huge families and many friends, because of space, we could only invite 80 people to our wedding. We narrowed down the guest list to people we hope will be active participants in our lives. We wanted them all to know each other, to break bread together, and to have a memorable experience in a beautiful place. According to the guests we've spoken with, it worked.

Sustainability

· We did everything we could to purchase elements of our wedding locally. Bubbs and I usually try to support local business in our daily lives, but this was another element that became easier as we looked outside the traditional "wedding" vendors.

· We purchased all of our wine & beer from local organic makers

· Our caterer used local organic ingredients to make our delicious BBQ feast

· We purchased a lot of the vases and décor from local thrift shops (even though we live three hours away)

· Our table runners were made from recycled burlap coffee sacks

· The candles were either made from soy (burns clean) flakes or were purchased second hand from craigslist.

· Just by alerting our guests on our blog that we were trying to have a "clean/green" wedding, we ended up really engaging them in the process (recycled gift wrap, reused gifts, carpooling, etc.)

Style

· We went with a simple and difficult to mess up style.

· Focused on nature, sustainability, and things that were recyclable

· Used burlap for décor (it was reused from a coffee roaster and compostable when we were done)

· Chose a location that was beautiful without a lot of distraction

· I followed blogs, looked at expensive shops to get inspiration, but ended up making a lot of the décor myself, for a teensy fraction of the retail price.

Love

· Our amazing cousin marrying us

· We wrote our vows together over many months. Not only did we spend time looking at relationships that worked, but also those that didn't. We wanted to make sure we were promising the same things to each other (no surprise vows here).

· Creating our ceremony from scratch. Looking at a lot of different vows on many different wedding websites, we took pieces of each, but our ceremony was all about letting our community understand our love and our commitment very simply and very clearly.

· Bubbs and I had mini vacations to plan our wedding - we went wine tasting in mendocino county and ate at different restaurants, so every element had a bit of our love and our experience in it.

· Having “wedding parties” to make music playlists, do crafts, and organize all the elements.

· Focusing on community building and having our community surround us for three days.

Monday, July 6, 2009

I've moved! More Wedding Goodness!

I've moved my blog to a fancy site:

homegrownwedding.com

Click on "Homegrown Discussion" and you can add it to your google reader!

Friday, July 3, 2009

Stealing for Our Ceremony - The Chuppah / Canopy


One of the most beautiful elements of our friend's wedding was the chuppah. We decided we had to have one, but we decided that Bubbs would make it.

This was also the one and only thing about the wedding that stressed me out.

I had a vision in my head of a rustic structure with flowing fabric blowing in the wind. Since I'm not an artistic person it was really difficult to convey this image to my fiance.

We set out to the San Francisco Flower mart to find some (in order of perference)
1) birch branches
2) bamboo branches
3) anything that would work

We came across the "stick" guy who had beautiful curly willow branches for sale. 5 branches for $15 dollars (the birch were about $75 each and bamboo was about $50 each). Bubbs decided that we needed 15 branches to do the job which is where my first concern started to bubble over. I let him guy them and we strapped them into my teeny car and brought them home.


Some of the first attempts really stressed me out. Bubbs just wasn't getting my vision, but he really wanted this to be HIS project.
Most of his "creations" were just too bulky, function over form, and really not steady enough for me to feel safe standing under during my wedding.

A lot of people build their Chuppah or canopy using cement to anchor the sticks, but I didn't like the aesthetic of that, nor did I want to have to carry heavy buckets filled with cement up to the wedding.

I suggested using Christmas tree stands on 4 of the branches and draping the fabric to the top. It would be easy, light, and look like what I wanted (see example below), but he wanted to use power tools :)Eventually, many designs later, we came to one that would work for me. It used all 15 sticks, was big enough for us to stand over, and stood free form in the backyard for several days.


When Bubbs and the "men" at the wedding recreated the Chuppah, it didn't come out exactly as we had planned, but once we arrived at the wedding, I put on my "I've done my planning and I will refrain from micromanaging the process" attitude, and let it be.
Lesson's learned:
  • simple structure is better
  • take pictures and give them to the people who are setting up for you
  • write down the details they might not know are important to you
  • secure the fabric to the top of the chuppah so it doesn't blow away or move around during the ceremony
  • set up the day before so you can tweak anything that doesn't work for you

Stealing for our ceremony - The seven blessings


Right when Bubbs and I decided to get married, we attended the wedding of some friends of ours.

This is a post from our personal wedding blog:

Sunday night Tim and I attended the wedding of our friends. We didn't really know anyone but the bride and groom, but met great folks there and got some good ideas. I've never been to a Jewish wedding before, but I think this one was adapted from a traditional ceremony only using the couple's favorite parts. A couple times during the ceremony, Tim and I looked at each other with knowing eyes that said "we're totally stealing that". These things were: The huppah, the seven blessings, and the ketubah. I think Tim likes the fact that we'll be signing a contract, but the wording on our friend's ketubah was amazing. We're stealing it. One of the best parts of the night were the speeches given by their wedding party - they were all beautiful, funny, sincere and interesting.

Stealing those components were key. Several months later people still talk to us about the blessings our families gave.

We talked with our family (luckily, we had exactly seven family members) to explain what we wanted. They could read a poem, and except from a book, they could write something, we just wanted their "blessing" on the day and on our love. We had to re-explain several times (a challenge of a home-grown non-traditional concept). But they ended up perfect. What was really special was different blessings resonated with each of our guests.


My mom wrote something that people still talk about. Explaining our love from her point of view.

Bubb's mom chose a traditional Jewish Blessing.

His brother and sister in law read a Neruda poem

My brother wrote something, as did bubb's dad.

My sister brought her whole family up (my niece the flower girl sleeping in her arms) and played on her ipod dock, "let's stay together" by al green. The song went on just a little too long, but people were singing along, it even brought one of our friends to tears.

Some people cried when they read their reading, some made us cry, and even though it might have looked hectic up there, we got up from our little bench after each reading to hug the reader. This was by far my favorite component of the ceremony.

Thursday, July 2, 2009

Invitation Inserts - RSVP


Our RSVP cards were postcards. It saved us money on stamps for them as well as on the weight of the actual invitations. Two got lost in the mail, but the rest arrived no problem.

One of the coolest things we did was create an online RSVP. I searched and searched for a "widget" or "doodle" or whatever the things are called you can insert into blogs, but couldn't find one that would create a form to collect information.

We used surveymonkey.com to create a free survey and on our blog we linked to it. The data that was entered by our guests was then accessible in a spreadsheet for us to sort and look at. The majority of people used our surveymonkey survey and it was a great way to collect email addresses, song requests (which were a HIT on the dance floor), and to make sure we were spelling names correctly. The only bummer with survey monkey was that they don't email you when new people have responded to your survey, so we had to keep checking back.

Invitation Inserts - Information


We created a wedding blog for our guests (and for us) because the normal wedding website templates just wouldn't work for a homegrown wedding like ours. We ended up using it to tell them about our journey together and exciting details about the weekend. It was another "project" but a fun one that we both used often.

Even though we told them about it everywhere on our invite, people didn't start going to our blog until I sent a mass email with a link.

Invitation Inserts - Accommodations

Since each invitation had a different accommodation listed, I used the old fashioned 'fill in the blank' method. I wish I had taken the time to print each one individually or used a mail merge. The reverse side of the invitations had the names of the people they would be sharing a house with and their contact information so they could plan on food sharing.

Invitations Inserts - What to Bring


This was a very important insert. Since the houses were equipt with full kitchen and bathrooms, I wanted everyone to know they needed to bring food, but not much else. We still ended up needing to tell people in person, through a mass email, and still through word of mouth, but this was the beginning of their understanding of what a homegrown wedding weekend would look like. We had three different inserts for "what to bring." One for campers, one for people who were staying in a house, but didn't have a room, and one for people in the houses that had a room.

Invitation Inserts - Map & Directions

(you can click on the pictures for a larger image)

I made this map using the DIY instructions here

It was a challenge, but I am very happy with the way they turned out. Our location is in a very remote location with no signs - so the map and detailed directions were KEY.

Invitation Inserts - The invitation itself

One of the things I struggled with on our weekend long wedding was how to convey the ideas and the flow of the weekend to people. We had a lot of room in the invitations to try, so I thought I'd post the components in case you want to borrow.

I used Microsoft word for all of my invitations. Should I have used Publisher, illustrator, or some other programs actually MADE for graphic stuff? Probably. Would have have saved me TONS of time? Probably. Was it in our budget? Nope!

Invitation wording:

Together with our parents Bubbs McDude & Gigi Geegerson

invite you to

join us for a weekend

among the redwoods

as we celebrate

our love &

join our lives

together

Magical Place
Redwood Valley, CA

May 29-31, 2009

Ceremony at dusk
May 30, 2009

Reception immediately following

Homegrown papercuts...I mean invitations

If there are lessons to be learned from the long road of my invitation making, I would love pass them along.

I made my invitations, from scratch (except the pocketfolders which I bought).

Lessons learned:

1) Search the internets, magazines, stationary stores, and blogs for invitation inspiration. I got started on the invitations early because we didn't have a budget to have them made, and I knew I would have fun working on them.

2) Start early. Play with them while you watch TV, in between turns on scrabble, and during your breaks at work (if you really want to bring your wedding planning to work :). When I would work on them and be able to put them away for awhile, I would figure out the problems I was having and come back refreshed and ready to work again.

3) Don't use black ink for cutting lines if you are printing more than one "insert" or item per page. Use the lightest grey possible. This was a VERY painful lesson to learn. I spent a lot of time re-cutting the lines to get rid of the black thin line along the edge.

4) Sometimes its worth it to just buy something pre-made. I knew I wanted to make the invitations myself (The wedding just wouldn't seem like our wedding if someone else made everything), but after over $20 worth of supplies and many frustrating attempts to make the pocket folders, I found them on sale for about $20 total. Buying them was well worth it.

5) USE ETSY! The tree graphic we had was "borrowed" from a painting we found online. After many failed attempts to make the tree brown (and we're talking over 5 hours of work) and also white (you'll see another earlier version of the invite later), I put an alchemy request on etsy to have someone turn the painting graphic into a high resolution image. 15 minutes later and $10 out of my paypal account, I had two graphics that were PERFECT.

6) The $4 corner rounder is well worth the effect. My poor husband gave his thumbs to me over many evenings and rounded the corners on all 6 inserts of our invitations and they were SO worth it. When people found out we made the invitations they all wondered how we got the corners round.

7) Making a pretty map is easy - and fun. I used these DIY instructions and got a lot of great comments on our map: http://www.weddingbee.com/2007/05/04/diy-invitation-map/
8) We used this motto again and again in our wedding planning, and it really helped with the invitations: If someone is going to be offended by us __________, do we really want them there? In the case of the invitations, the "blank" was that we typed the names and addresses on the front of the envelope. We went down the list of guests and decided that not one person would object - or at least say anything. Our wedding was going to be different from any they had ever attended - and this was the perfect way to introduce them to that.


9) Send yourself a sample in the mail and also to someone who hasn't seen it yet for a fresh set of editing eyes.

Saturday, June 20, 2009

Homegrown Engagement Rings

When Bubbs and I first started talking about getting married and had found our perfect location (details to com), he started asking me about a ring. I had always loved my aunt's ring and told him what I wanted based on that. One afternoon, we were having lunch with my aunt, who is also a jeweler and Bubbs asked her about jewelers - long story short, she gave him the ring. THE ring that I've always loved. She offered it to him so he could use the metal to create a new ring, but once I saw it, there was no way I would let him do that. He decided to change out the stones it came with and re-do a little detail work on it before he would "officially propose."

So...here's my beautiful ring:


From Bubbs:
So, here's a little dish about the engagement ring. It is an amazing 1920's platinum setting from a family member. I chose a dark sapphire (but with a lot of fire) as the center stone and Moissanite (clear and almost as hard as diamonds but with more reflectivity) as side stones. After much research into the environmental and social damage caused by mined stones, I decided to use lab created stones from Chatham Labs here in San Francisco.


Though this is a hot new trend among us tree huggers in SF, it has been a challenge to find a good goldsmith willing to do the work. The etching and shape of the setting is quite a work of art--platinum in the 20's was a new harder precious metal that required extra skill to etch--and so I wanted someone who could restore the setting. There is a small diamond chip that needs replacing and some previous repair work was done in white gold and should be removed and replaced with platinum. Also, the palm side of the band has been worn thin from years of use (a good omen as far as I'm concerned) so had it shored up for another 70+ years.

Monday, June 15, 2009

How to have a home grown wedding

In no way am I saying that our wedding will work for everyone. But it was perfect for us. We want to share what we hope becomes a new tradition in weddings.

We live in an expensive city (San Francisco), and a lot of what made this wedding possible, was traveling three hours outside the city. Prices immediately dropped (for everything but rentals) when we got outside the traditional wedding areas.

I'll list our components here and go into more details in a future post.

Community
  • Our entire guest list (except one pregnant couple) stayed with us on the site.
  • While not everyone can do this, we wanted to find a place where we could host our family's accommodations. The economy has hit our family hard and wanted everyone to come celebrate for all three days. It was completely worth it, and everyone appreciated it.
  • We grouped people together and asked them to plan their meals before the wedding which spurred amazing groupings, beautiful moments, and great food!
  • Despite our huge families and many friends, because of space, we could only invite 80 people to our wedding. We narrowed down the guest list to people we hope will be active participants in our lives. We wanted them all to know each other, to break bread together, and to have a memorable experience in a beautiful place. According to the guests we've spoken with, it worked.

Sustainability

We did everything we could to purchase elements of our wedding locally. Bubbs and I usually try to support local business in our daily lives, but this was another element that became easier as we looked outside the traditional "wedding" vendors.
  • We purchased all of our wine & beer from local organic makers
  • Our caterer used local organic ingredients to make our delicious BBQ feast
  • We purchased a lot of the vases and décor from local thrift shops (even though we live three hours away)
  • our table runners were made from recycled burlap coffee sacks
  • The candles were either made from soy (burns clean) flakes or were purchased second hand from craigslist.
  • Just by alerting our guests on our blog that we were trying to have a "clean/green" wedding, we ended up really engaging them in the process (recycled gift wrap, reused gifts, carpooling, etc.)
Style
  • We went with a simple and difficult to mess up style.
  • Focused on nature, sustainability, and things that were recyclable
  • Used burlap for décor (it was reused from a coffee roaster and compostable when we were done)
  • Chose a location that was beautiful without a lot of distraction
  • I followed blogs, looked at expensive shops to get inspiration, but ended up making a lot of the décor myself, for a teensy fraction of the retail price.
Love
  • Our amazing cousin marrying us
  • We wrote our vows together over many months. Not only did we spend time looking at relationships that worked, but also those that didn't. We wanted to make sure we were promising the same things to each other (no surprise vows here).
  • Creating our ceremony from scratch. Looking at a lot of different vows on many different wedding websites, we took pieces of each, but our ceremony was all about letting our community understand our love and our commitment very simply and very clearly.
  • Tim and I had mini vacations to plan our wedding - we went wine tasting in mendocino county and ate at different restaurants, so every element had a bit of our love and our experience in it.
  • Having “wedding parties” to make music playlists, do crafts, and organize all the elements.
  • Focusing on community building and having our community surround us for three days.